How To Remove Lash Extensions At Home
How to Remove Lash Extensions at Home - Your Gentle Guide
Sometimes, those lovely lash extensions, which make your eyes look so bright and full, start to get a little sparse or maybe you just feel ready for a fresh look. It happens, you know, when a few lashes here and there decide it's time to part ways, and suddenly your once perfect fringe looks a bit uneven. It's a common situation, and perhaps getting to the salon for a professional removal isn't an option right at this moment. You might be wondering if there's a safe way to take them off yourself without causing any trouble for your natural lashes, and the good news is, there actually is a gentle method you can use right where you are.
This guide is here to walk you through a simple, kind way to handle those lingering lash extensions, giving you the power to manage them from the comfort of your own space. We'll talk about the tools you'll need, which are probably already sitting in your kitchen or bathroom, and how to put them to good use. It's all about being gentle and patient with your eyes, making sure your natural lashes stay happy and healthy throughout the whole process. So, let's get ready to make this happen for you.
You see, a seasoned beauty expert, someone who really knows their way around lashes, has shared some simple steps that can help you take off those extensions in a way that's both effective and kind to your delicate eye area. This isn't about pulling or tugging, but rather about using products that gently encourage the adhesive to let go. By the time we're through with this little chat, you'll have a clear idea of what to do, what to use, and how to go about it, giving you the confidence to manage your lash extensions at home, or even help speed up their natural departure if you're just looking for a quicker way to refresh your look.
Table of Contents
- What You'll Need to Remove Lash Extensions at Home?
- Getting Ready - Preparing to Remove Lash Extensions at Home
- How Does Oil Help to Remove Lash Extensions at Home?
- The Gentle Steps to Remove Lash Extensions at Home
- What if They Don't All Come Off?
- Aftercare - Once You Remove Lash Extensions at Home
- Why is Patience Important When You Remove Lash Extensions at Home?
- A Few Last Thoughts on How to Remove Lash Extensions at Home
What You'll Need to Remove Lash Extensions at Home?
Before you get started on this little beauty project, it's a good idea to gather everything you'll need. Having all your bits and pieces ready means you won't have to stop halfway through, which can be a bit annoying when you're trying to be careful around your eyes. These items are pretty common, and you might even have them just lying around the house, which is pretty convenient, don't you think? We're talking about simple things that, when put together, create a gentle and effective way to loosen that strong bond holding your extensions in place. So, let's look at the few things you'll want to have close by.
First off, you'll definitely want a bowl of warm water. Not too hot, just comfortably warm, almost like a cozy bath for your face. This warmth plays a pretty important part in the whole process, helping to prepare your lashes for what's next. Then, you'll need a very clean, soft towel. Something that feels nice against your skin, like a small hand towel or even a soft washcloth. This will be used to create a warm compress, which is a key step in helping to soften the adhesive that keeps those extensions stuck on. It's all about being gentle, you know?
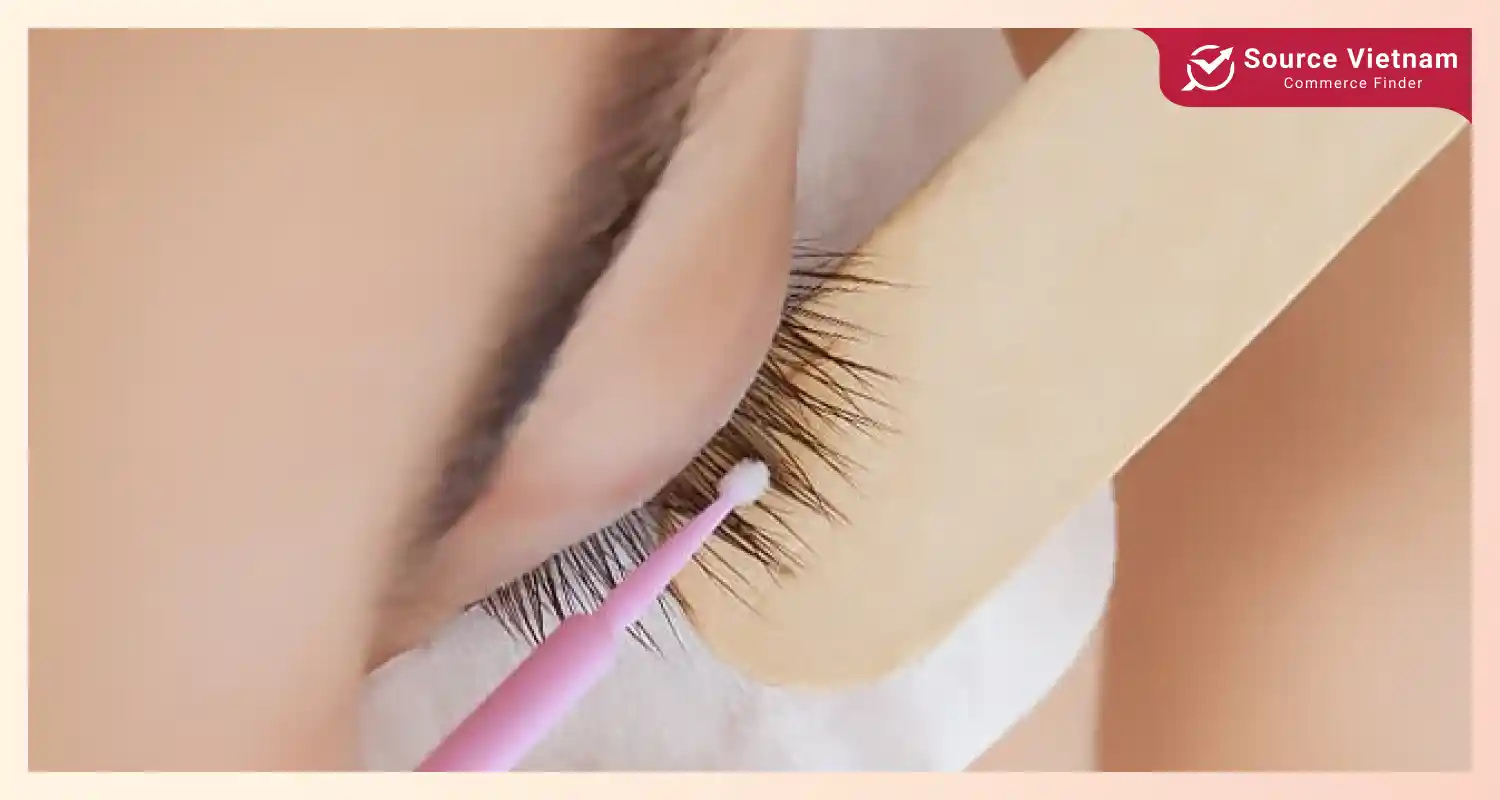
Next on your list is a spoolie brush. You know, one of those little mascara wands, but make sure it's clean and doesn't have any old mascara on it. If you've ever had lash extensions put on, your technician probably gave you one to brush your lashes with, so you might already have one tucked away somewhere. This little brush will be super helpful for gently working the oil through your lashes without pulling. Also, you'll want a good mirror, one that lets you see your eyes clearly, perhaps a magnifying one if you have it, and make sure you're in a spot with plenty of light. This really helps you see what you're doing and be as precise as possible, which is, you know, quite important when you're working near your eyes.
And then, for the star of the show, you'll need some coconut oil. This is a pretty common item, found in most kitchens or beauty aisles. It's chosen for a good reason, too, as it has properties that can help break down the adhesive used for lash extensions without being harsh on your skin or natural lashes. You could use other oils, like olive oil or even castor oil, but coconut oil tends to be a popular choice because it's widely available and generally well-tolerated. So, basically, that's your little toolkit for getting those extensions off gently and effectively, making the process of how to remove lash extensions at home much simpler than you might think.
Getting Ready - Preparing to Remove Lash Extensions at Home
Once you have all your supplies laid out, getting ready is the next simple step. This part is all about setting the stage for a smooth and gentle removal, making sure your eyes are comfortable and ready for the process. It's like preparing for a relaxing spa moment, just for your eyes, you could say. The initial preparation is key to making sure the extensions come off with ease and without any tugging or pulling on your own lashes, which is what we definitely want to avoid here. So, let's talk about how to start this process of how to remove lash extensions at home.
The first thing you'll want to do is grab that clean towel and dip it into your bowl of warm water. Make sure it's wet enough to hold some heat, but not dripping. Then, gently wring out any extra water so it's just damp and warm. This warm compress is going to be your best friend for the next few minutes. It's a really simple step, but it makes a big difference, you know, in getting things ready.
Now, with the warm, damp towel, gently place it over your closed eyes. Just let it rest there for a few minutes. Think of it as a warm, soothing blanket for your eyelids and lashes. This warmth does a couple of important things. For one, it helps to relax the delicate skin around your eyes, making everything a bit more pliable. More importantly, though, the heat and moisture work together to start loosening the bond of the lash extension adhesive. It doesn't dissolve it right away, but it begins to soften it up, which is exactly what we need for a gentle removal. You might feel a bit of steam, which is fine, as long as it's not too hot. Just a few minutes, maybe five or so, will do the trick.
While the towel is resting, you can just take a moment to relax, too. It's a good opportunity to breathe and get yourself in a calm state. After those few minutes have passed, gently take the towel away. Your lashes and the skin around your eyes should feel warm and a little bit softer. This preparation really helps in making the subsequent steps of how to remove lash extensions at home much more effective and, more importantly, much safer for your natural lashes. It's a small step, but it truly sets the tone for a successful removal.
How Does Oil Help to Remove Lash Extensions at Home?
It's interesting, isn't it, how something as simple as oil can be so effective in breaking down something as strong as lash extension glue? There's a bit of science behind it, but it's really quite straightforward to grasp. When we talk about how to remove lash extensions at home, understanding why oil works is pretty useful. The strong adhesive used for lash extensions is typically made to be very durable and water-resistant, meaning it won't just wash away with a splash of water. That's where oils come into play, offering a different kind of approach to getting them off.
Most lash extension glues are made with a chemical called cyanoacrylate, which forms a super strong, instant bond. This type of glue is designed to resist water, but it's not quite as resistant to certain types of oils. Oils, especially natural ones like coconut oil, are what we call "lipophilic," meaning they are attracted to fats and oils. The adhesive, in its cured state, has a structure that can be affected by the fatty molecules present in the oil. When the oil comes into contact with the glue, it begins to work its way into the adhesive's structure, causing it to swell slightly and lose its grip. It's a bit like how oil can help loosen sticky residue from a label, if you've ever tried that, you know?
So, when you apply the coconut oil to your lashes, it doesn't just sit on top; it starts to penetrate the glue bond. This action weakens the adhesive's hold on both your natural lash and the extension. Over time, as the oil continues to work, the glue becomes softer and less sticky, making it much easier for the extensions to slide off without any force or pulling. This is why patience is pretty important during this step, as the oil needs a little bit of time to do its job properly. You're not trying to yank them off, but rather encourage them to release themselves gently.
Using oil is considered a much safer way to remove lash extensions at home compared to trying to pick or pull them off, which can severely damage your natural lashes. A lash specialist would tell you that oils are a gentle solvent for these specific glues. They allow the extensions to detach with minimal stress on your own lashes, helping to keep your natural lash line healthy and intact. So, the magic of oil is really in its ability to break down that strong bond in a soft, non-abrasive way, making it a truly effective and kind method for getting those extensions off when you're ready for them to go.
The Gentle Steps to Remove Lash Extensions at Home
Now that you're all set up and understand a bit about why oil works, let's get into the actual steps for how to remove lash extensions at home. Remember, the key here is gentleness and patience. You're not in a race, and being slow and steady will protect your natural lashes. This process is designed to be as kind to your eyes as possible, ensuring that when the extensions come off, your own lashes are still looking their best. So, let's go through it bit by bit.
After you've done your warm compress, your lashes should be feeling a bit softer. Now, take a small amount of coconut oil. You don't need a huge glob, just enough to coat your lashes. You can warm it up a little between your fingers to make it easier to work with, if it's solid. Then, using your fingers or a clean cotton swab, very gently apply the oil to your lash extensions. Make sure you get it right at the base of the extensions, where the glue is, and work it all the way to the tips. Be careful not to get too much oil in your eyes, as it can make things a bit blurry for a while, though it's generally harmless.
Once the oil is on, let it sit for a good few minutes. Some people even suggest letting it sit for 10-15 minutes, or even longer, especially if your extensions are very new or the glue is particularly strong. You could even apply it before bed and let it work overnight, which is a pretty common trick. The longer the oil has to soak into the adhesive, the more it will soften the bond. This is where that patience really comes in handy, as the oil needs time to do its job. You might feel a slight tingle or nothing at all, which is perfectly normal.
After the oil has had plenty of time to work its magic, gently take your clean spoolie brush. With your eyes closed or looking down into a mirror, very, very softly brush through your lashes. Start from the base and brush outwards, just as you would if you were applying mascara. You should notice some of the extensions starting to slide off with minimal effort. If they don't come off easily, don't force it! Just reapply a bit more oil and let it sit for another few minutes. The idea is for them to detach on their own, not to be pulled off. This gentle brushing is a good way to help them release without any pulling on your natural lashes.
You might find that some extensions come off easily, while others need a bit more coaxing. That's totally fine. Just keep reapplying oil and gently brushing. It's a gradual process, not an instant one. The goal is to remove lash extensions at home safely, and that means taking your time. You may need to repeat the oil application and gentle brushing a few times over the course of an evening, or even over a couple of days, especially if you have a lot of extensions or they're particularly stubborn. Remember, a seasoned beauty expert would always stress gentleness above all else to protect your natural lash health.
What if They Don't All Come Off?
It's entirely possible that after your first attempt, not every single lash extension will come off. Don't worry, that's actually pretty common and totally okay. Sometimes, certain extensions are just a bit more stubborn, or perhaps the glue on them was applied a little more generously. This doesn't mean you're doing anything wrong; it just means you might need to give them a little more time and attention. The goal here is to get them off without causing any damage, and that sometimes means being a bit persistent, but always gentle, in your efforts to remove lash extensions at home.
If you find that some extensions are still holding on tight, the best thing to do is simply reapply the coconut oil. You can put a fresh layer on the remaining extensions, making sure to coat them well, especially at the base where the adhesive is strongest. Then, just let the oil sit for a longer period. You could even leave it on overnight while you sleep. The extended contact time gives the oil more opportunity to really work its way into the glue bond and weaken it further. You might find that after a longer soak, those stubborn ones will slide off much more easily when you try to brush them again in the morning.
Another thing you can do is repeat the warm compress step. Sometimes, a fresh burst of warmth and moisture can help reactivate the softening process. After the warm compress, reapply the oil and let it sit. This combination of heat and oil is a pretty powerful duo when it comes to dissolving that strong glue. Just keep in mind that patience is your biggest ally here. Trying to pick or pull at them will only cause harm to your natural lashes, which is exactly what we're trying to avoid. So, resist the urge to force anything, even if it feels like they're taking forever to budge.
It's also worth noting that sometimes, the extensions might be ready to come off, but they just need a little extra encouragement. A very gentle, light massage of the lash line with your fingertips, after the oil has soaked in, can sometimes help. Again, this must be done with extreme lightness, just barely touching your eyelids. If you feel any resistance or pulling, stop immediately. The idea is to simply encourage the natural shedding process, not to rip anything out. So, if they don't all come off at first, just keep applying oil and being patient, and they will eventually release, making the process of how to remove lash extensions at home a success.
Aftercare - Once You Remove Lash Extensions at Home
Once all those lash extensions have gracefully departed, your natural lashes might feel a little different. They might seem shorter, or perhaps a bit sparser than you remember, which is a pretty common feeling after extensions. This isn't usually because of damage, but simply because you've gotten used to the added length and volume of the extensions. Taking good care of your natural lashes right after removal is a really important step to keep them healthy and help them recover, so to speak. So, let's talk about what to do once you've successfully managed to remove lash extensions at home.
First, gently cleanse your eye area. You'll likely have some residual oil on your lashes and eyelids, and you'll want to get that off. Use a very mild, oil-free cleanser specifically designed for the eye area. Something gentle that won't irritate your eyes. Wash your face as you normally would, making sure to lightly clean your lash line to remove any lingering oil or adhesive bits. Pat your eyes dry with a soft towel, being careful not to rub. This helps to make sure your lashes are clean and ready for a little pampering.
After cleansing, it's a good idea to give your natural lashes a little boost. You can apply a lash serum, if you have one, or even a tiny bit of castor oil. Castor oil is known for its conditioning properties and many people find it helps to support lash growth and strength. Just a very small amount applied with a clean spoolie brush to your lash line before bed can make a difference. This helps to nourish your natural lashes and keep them feeling soft and healthy, which is, you know, a nice way to show them some love after all that extra weight they were carrying.
It's also a good time to give your lashes a break from heavy makeup, especially mascara. Let them breathe for a few days, if you can. If you do wear mascara, choose a gentle, non-waterproof formula that's easy to remove without harsh scrubbing. Remember, your natural lashes are still recovering and might be a little more delicate than usual. Giving them a little time to rest and rebuild their strength is a pretty smart move. By following these simple aftercare steps, you're not just removing extensions; you're also taking care of your natural lashes, ensuring they stay in good shape for whatever lash look you decide on next.
Why is Patience Important When You Remove Lash

How to Remove Individual Eyelash Extensions at Home? (Easy) - Skinprosac
How to Remove Eyelash Extensions at Home Safely and Easily

How to Remove Eyelash Extensions Safely at Home - Lulu Beauty Spa
