How To Remove Popcorn Ceiling - A Home Guide
That textured ceiling, often called popcorn or acoustic, has probably seen better days. It's a look from another time, and frankly, it tends to gather dust and cobwebs like nobody's business. Many folks are looking to give their rooms a fresh, new feel, and getting rid of that bumpy surface is a big step in that direction. You know, it really changes the whole vibe of a place.
Updating your overhead space can make a room feel bigger and brighter, bringing it right into the present. That old-fashioned, lumpy finish can make a room seem a bit dated, so smoothing it out can really give your home a lift. It's a project that, while it might take some time, is very much worth the effort for the way it transforms your living areas, too.
You might be thinking about tackling this project yourself, or perhaps you're just curious about what it involves. Either way, we're going to walk through the general steps and considerations for changing that textured ceiling. It's simpler than you might think with the proper tools and a little bit of know-how, and we'll show you how to update a textured ceiling, or perhaps even cover it up, if that's more your speed.
Table of Contents
- What is Popcorn Ceiling Anyway?
- Why Do People Want to Know How to Remove Popcorn Ceiling?
- Identifying Your Popcorn Ceiling - How to Remove Popcorn Ceiling Safely
- What Supplies Do You Need to Remove Popcorn Ceiling?
- Getting Ready to Remove Popcorn Ceiling - Preparing Your Space
- How Do You Actually Remove Popcorn Ceiling?
- Cleaning Up After You Remove Popcorn Ceiling - Keeping Things Tidy
- Is There Another Way to Update a Textured Ceiling Besides How to Remove Popcorn Ceiling?
What is Popcorn Ceiling Anyway?
When we talk about popcorn ceilings, we're referring to that particular kind of ceiling finish that looks like, well, popcorn. It’s also known by other names, like cottage cheese ceiling or acoustic ceiling, due to its bumpy and uneven texture. This style was pretty common in homes built from the 1950s through the 1980s, primarily because it was a relatively inexpensive way to finish a ceiling and could even help a little with sound dampening, in some respects.
The texture itself is made from a mix of materials, usually including paper, often Styrofoam, and sometimes even a small amount of asbestos fibers, especially in older installations. It was sprayed on, which made it a quick job for builders back then. You can easily spot these ceilings by their distinct, lumpy surface, which feels a bit rough to the touch. Honestly, it’s a very recognizable look once you know what to watch for.
While it had its moment, this particular ceiling style has fallen out of favor. Homeowners today often see it as a sign of an older house, and they typically prefer the clean, smooth lines of a more contemporary design. Plus, that bumpy surface, as a matter of fact, really does collect dust and cobwebs, making it a bit of a challenge to keep clean. It’s just not a very practical surface for modern living spaces.
Why Do People Want to Know How to Remove Popcorn Ceiling?
So, why is everyone so keen on getting rid of these textured ceilings? The biggest reason, probably, is that they just don't fit with today's home styles. That bumpy look is definitely out of date, and smoothing out your ceiling can make a huge difference in how a room feels. It can give your space a much more current and fresh appearance, making it feel less like a blast from the past and more like a home of the present.
Beyond the look, there's also the matter of upkeep. As I was saying, those little bumps and crevices are perfect spots for dust and cobwebs to settle. Cleaning a popcorn ceiling is pretty much a chore, and it's hard to get it truly clean without making a mess or even damaging the texture. A smooth ceiling, on the other hand, is a breeze to wipe down and keep neat, which is definitely a plus for anyone who likes a tidy home.
Then there's the way a smooth ceiling can open up a room. Without that heavy texture, a room can feel taller and more open, letting light spread around better. It's amazing how much of an impact a plain ceiling can have on the overall brightness and spaciousness of a living area. For many, this change alone is enough reason to consider the project. It’s just a better backdrop for modern decor, you know.
Identifying Your Popcorn Ceiling - How to Remove Popcorn Ceiling Safely
Before you even think about getting rid of that textured ceiling, there's a really important step you need to take: figuring out what it's made of. You can easily spot popcorn ceilings by their distinct, lumpy surface, which, as I mentioned, often resembles cottage cheese. The big thing to consider here is that some older popcorn ceilings, particularly those put in before the late 1970s, might contain asbestos. This material, if disturbed, can release tiny fibers into the air, which are not good for your health at all.
Because of this potential danger, it is very important to know whether the popcorn ceiling you plan to remove contains asbestos. You absolutely should not start scraping away until you've had it checked. The best way to do this is to get a small piece of the ceiling material tested by a certified lab. This usually involves carefully taking a small sample, following specific safety steps, and sending it off for analysis. It's a relatively simple process, but it provides peace of mind and keeps you safe.
If the test comes back positive for asbestos, you'll need to think about your next steps very carefully. You might decide to hire a professional who specializes in asbestos removal, as they have the right equipment and training to handle the material safely. Alternatively, you could choose to cover the ceiling instead of removing it, which avoids disturbing the asbestos altogether. This is a crucial first step, seriously, for your safety and the safety of anyone else in your home.
What Supplies Do You Need to Remove Popcorn Ceiling?
If you've decided to go ahead with removing your popcorn ceiling, and you've confirmed it's safe to do so, gathering the right tools and supplies is your next move. Having everything ready before you start will make the job much smoother and less frustrating. You'll find that having the correct items on hand makes a big difference in how easily the texture comes off, and how tidy your workspace remains.
First, you'll want some safety gear. Think about eye protection, like safety glasses or goggles, to keep dust and debris out of your eyes. A good quality dust mask or respirator is also a must, to avoid breathing in any fine particles. Gloves will protect your hands, and a hat or head covering will keep your hair from getting covered in ceiling bits. Basically, you want to be well-protected, because this job can get a little messy.
For the actual removal, you'll need a spray bottle or a garden sprayer filled with water. Water helps to soften the popcorn texture, making it easier to scrape off. You'll also need a wide scraping tool, something like a floor scraper with a long handle, or a drywall knife that's at least 6 to 8 inches wide. A sturdy ladder or scaffolding is also essential, so you can reach the entire ceiling comfortably and safely. You know, you don't want to be stretching too much.
Finally, for cleanup and protection, grab plenty of plastic sheeting or drop cloths to cover your floors, walls, and any furniture you can't move out of the room. Painter's tape will help you secure the plastic. You'll also need buckets or large trash bags for collecting the scraped-off material. Some people even use a shop vacuum with a HEPA filter for the final cleanup. Having these items ready will help keep your home from turning into a complete dust zone, which is pretty important.
Getting Ready to Remove Popcorn Ceiling - Preparing Your Space
Before you start scraping, taking the time to prepare your room properly will save you a lot of trouble later. This step is about protecting your home and making the cleanup process much easier. It's kind of like setting the stage for a big project, you know, getting everything in its place.
First things first, clear out the room as much as you possibly can. Move all furniture, decorations, and anything else that might get in the way or get dirty. If there are things you can't move, like built-in cabinets or large appliances, cover them completely with plastic sheeting. Secure the plastic with painter's tape to make sure it stays put and creates a good barrier against dust and debris. This is actually a very important step for keeping your belongings clean.
Next, cover your floors with plastic sheeting or heavy-duty drop cloths. Extend the covering up the walls a bit, maybe about a foot or so, and tape it securely. You want to create a kind of "envelope" around the room to contain all the mess. Some folks even tape plastic over doorways to seal off the room from the rest of the house, which can really help keep dust from spreading. This is a simple step, but it makes a huge difference in the amount of cleaning you'll have to do later.
Also, turn off the power to the room at your circuit breaker. This is a safety measure, especially if you'll be working near light fixtures or ceiling fans. Remove any light fixtures, ceiling fans, or smoke detectors from the ceiling. Cap off any exposed wires with wire nuts and tape them securely to prevent accidental contact. You might also want to remove any wall decorations or curtains that could get in the way or get dirty. Basically, the more you protect now, the less you'll have to clean later, which is always a good thing, right?
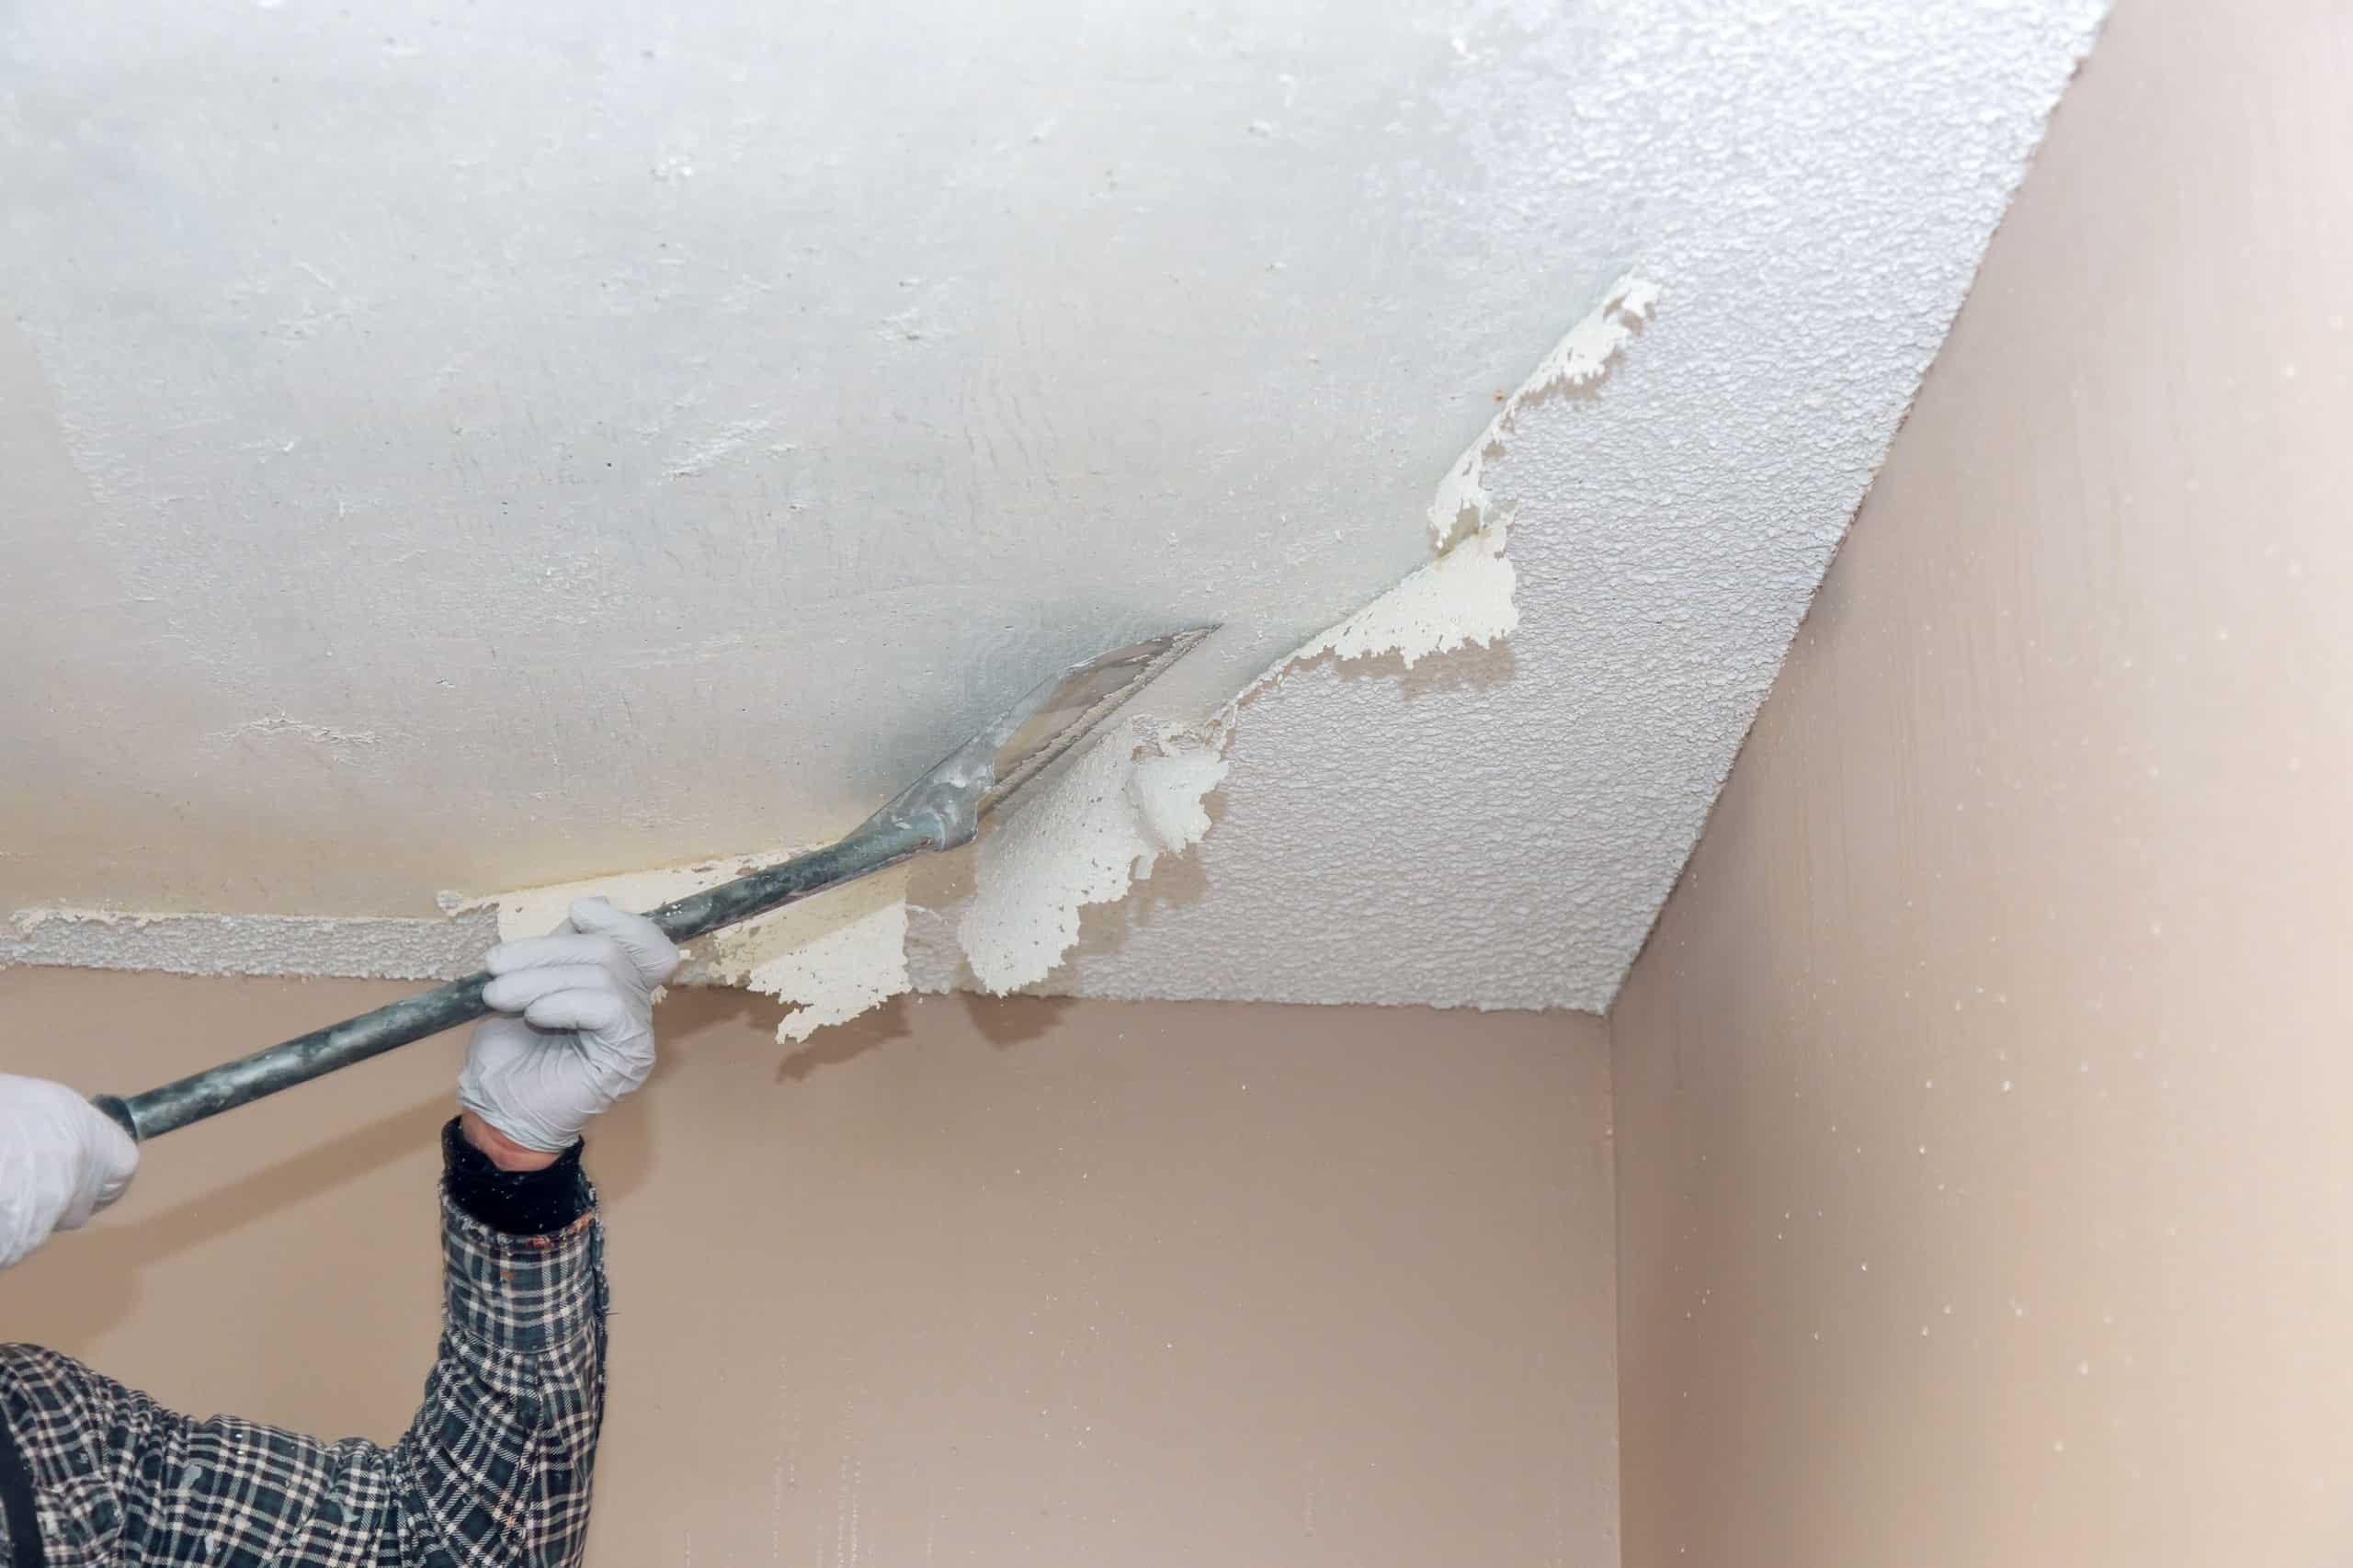
How Do You Actually Remove Popcorn Ceiling?
Once your room is prepped and you're wearing your safety gear, you're ready for the main event: getting rid of that popcorn texture. This approach involves manually removing the texture using specialized tools, and it's often simpler than people expect. The key is to work in small sections and be patient, as it can take a little while, but it’s very doable.
Start by lightly spraying a section of the ceiling with water. You don't want to soak it completely, just dampen it enough to soften the texture. Let the water sit for about 15 to 20 minutes. This allows the water to really get into the popcorn material, making it much easier to scrape off. If you spray too much, the ceiling material might get too mushy, and if you don't spray enough, it will be too hard to remove. It's a bit of a balancing act, you know.
After the texture has softened, use your wide scraping tool or drywall knife to gently scrape the popcorn material off the ceiling. Hold the scraper at a slight angle, just enough to get under the texture without digging into the drywall underneath. Let gravity help you, allowing the scraped material to fall onto the plastic sheeting below. Work in consistent, overlapping strokes, trying to remove as much as you can with each pass. You'll find that it comes off pretty easily once it's wet enough.
As you work, collect the scraped material into buckets or trash bags. This helps keep the mess contained and prevents you from stepping in it. If you come across any stubborn spots, spray them again with water and let them sit for a few more minutes before trying to scrape them. Remember, patience is your friend here. The goal is to remove all the texture without damaging the ceiling surface underneath. This process, as a matter of fact, can be quite satisfying once you get into a rhythm.
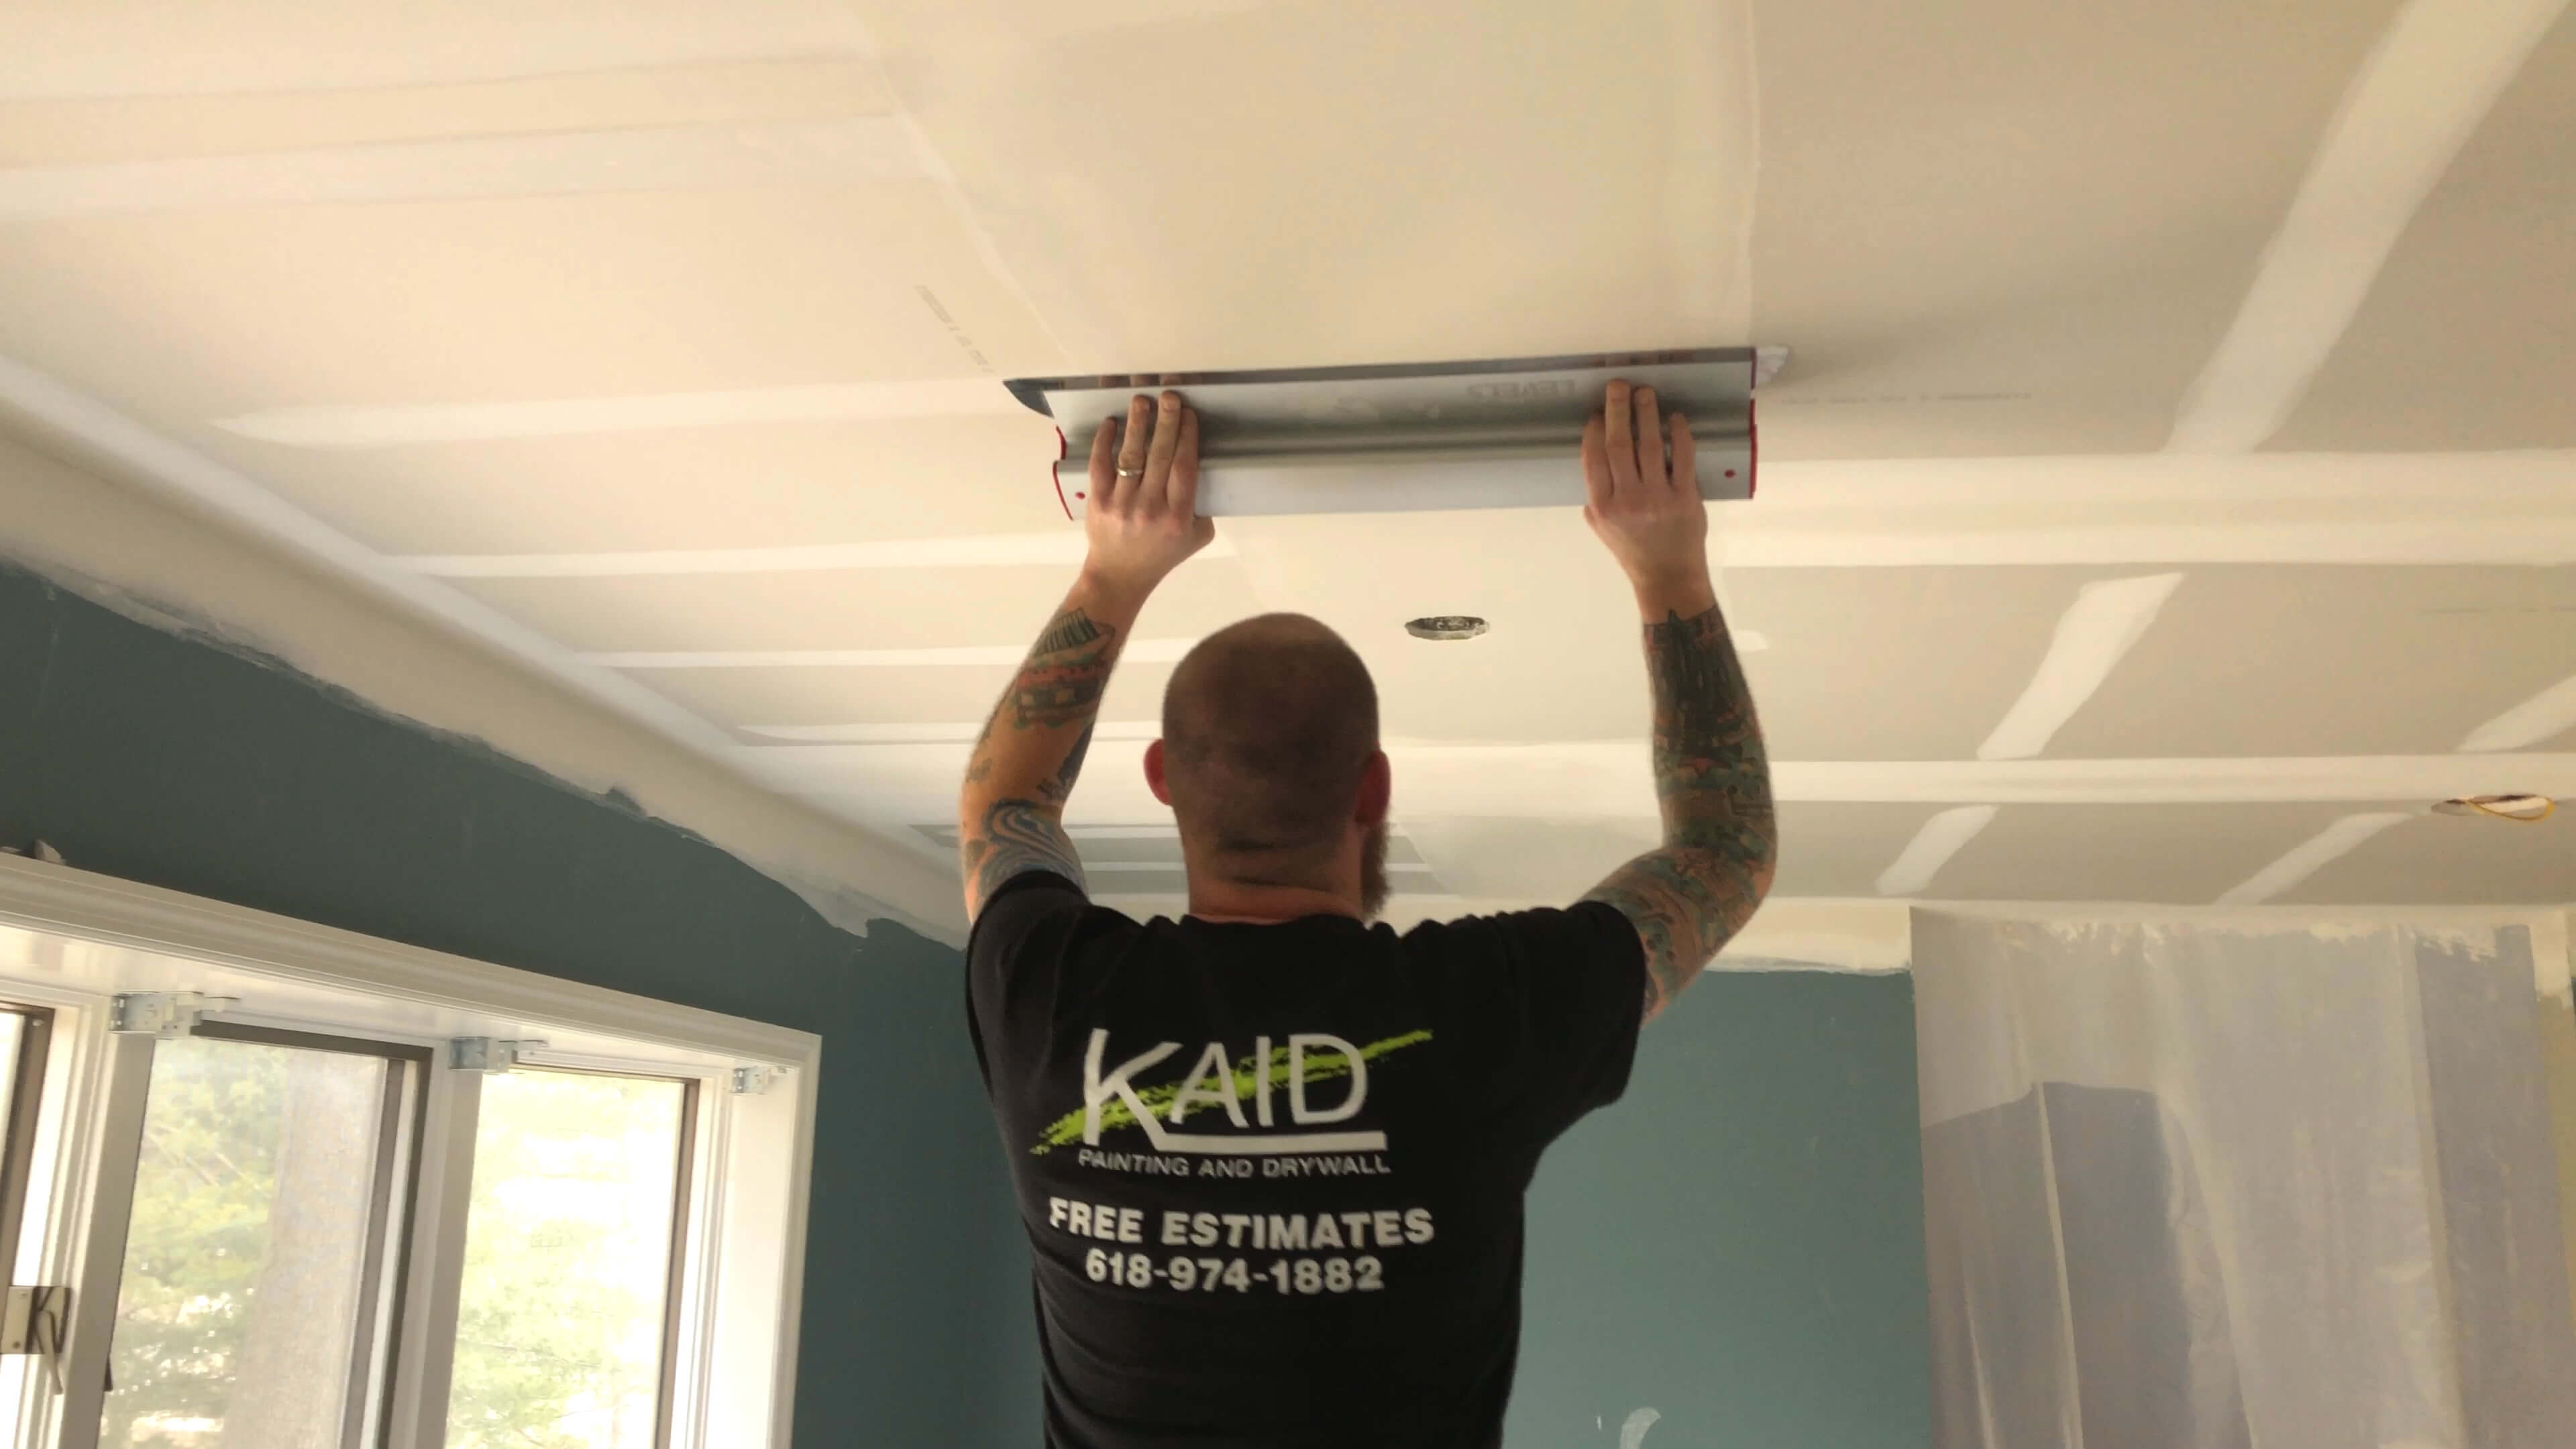
Once you've removed all the popcorn texture, you'll likely find that the ceiling surface isn't perfectly smooth. There might be some small bits of texture left, or some imperfections from the scraping. This is normal. You'll need to do a bit of light sanding to smooth out any remaining rough spots. Use fine-grit sandpaper on a sanding pole for this. After sanding, wipe down the ceiling to remove any dust. Then, you're ready for any patching, priming, and painting you want to do to finish your new, smooth ceiling. It's a pretty straightforward process, actually, when you break it down.
Cleaning Up After You Remove Popcorn Ceiling - Keeping Things Tidy
Removing a popcorn ceiling, as you might guess, can create a fair bit of mess. However, with the right preparation, cleaning up afterward doesn't have to be a huge headache. The key is to be systematic and thorough, making sure you catch all the dust and debris. This is where all that plastic sheeting really pays off, you know.
Once you've finished scraping and any light sanding, carefully roll up the plastic sheeting from the floor, gathering all the scraped-off material inside it. Try to do this slowly and deliberately to avoid sending dust into the air. Place the rolled-up plastic directly into large trash bags. If you have a shop vacuum, especially one with a HEPA filter, you can use it to vacuum up any remaining small bits of dust or debris on the floor and walls. This helps to capture fine particles that might otherwise float around.
After the main bulk of the mess is gone, you'll want to wipe down all surfaces in the room, including the walls, windows, and any remaining furniture, to remove any lingering dust. A damp cloth works well for this. You might even want to give the ceiling a final wipe down to ensure it's completely clean before you start any patching or painting. It's surprising how much dust can settle, even with all the precautions, so a good wipe-down is pretty important.
Finally, remember to clean your tools. Rinse off your scrapers and spray bottles, and store them away. Dispose of the trash bags properly. Taking these steps will help ensure that your home is clean and ready for the next phase of your ceiling project, whether that's painting, texturing, or something else. It’s actually a fairly simple process, keeping things tidy, if you plan ahead.
Is There Another Way to Update a Textured Ceiling Besides How to Remove Popcorn Ceiling?
While removing a popcorn ceiling is a very common way to update your space, it's not the only option available. Sometimes, the idea of all that scraping and potential mess, or the worry about asbestos, might make you think twice. The good news is that there are other ways to update a textured ceiling without having to take it all down. This might be a good choice for you, depending on your situation, you know.
One popular alternative is to simply cover the popcorn ceiling. This can be done in a few different ways. You could install new drywall directly over the existing popcorn ceiling. This creates a completely smooth, new surface, but it does add a bit of weight to the ceiling and can be a bit of a project itself. It's a very effective way to get a fresh look without disturbing the old texture, which is a pretty big plus.
Another covering option involves installing ceiling panels. These panels, which come in various materials like tin, wood, or even decorative fiberboard, can be attached directly to the existing ceiling. They offer a range of styles, from modern to traditional, and can completely hide the popcorn texture. This can be a quicker and cleaner method than removal, and it also allows for some really interesting design possibilities. It's a way to update the look without too much fuss, in some respects.
You could also consider skim coating the ceiling. This involves applying a thin layer of joint compound over the popcorn texture to create a smooth surface. It takes some skill to get a truly smooth finish, and it can be a bit messy, but it avoids the scraping process. This method basically fills in all the bumps and creates a flat plane for painting. It’s a good middle-ground option if you want a smooth look but want to avoid the full removal process.
So, whether you decide to take on DIY popcorn ceiling removal or learn how to cover a popcorn ceiling without removing it, there are paths to a more modern and appealing home. Each method has its own steps and considerations, but all of them lead to a refreshed look for your living areas. The main thing is to choose the approach that feels right for you and your home, and to always prioritize safety. It’s really about finding the best fit for your project, you know.

11 Tips on How to Remove Popcorn Ceiling Faster and Easier | Family
How to Remove a Popcorn Ceiling
How to Remove Popcorn Ceilings - LEVEL5 Tools LLC.
